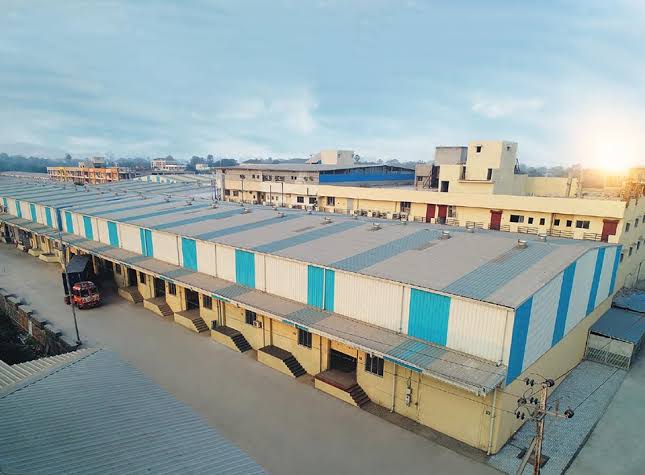
Enquiry
Request A Call
Sitemap
What We Offer

Additional Information

Shutdown and Troubleshooting

Shutdown Procedures

Whenever the system is shut down and the chlorinator is removed, it must be evacuated of residual gas before being removed from the tank. To do so:

  • 1. Open the rate valve to the top.
  • 2. Shut off the water supply.
  • 3. Shut off the chlorine cylinder valve.
  • 4. Turn on the water.
  • 5. Draw vacuum into the system. Wait until the ball in the valve reaches and stays at the bottom of the tube.
  • 6. Release the vacuum by loosening the hose from the top fitting of the chlorinator.
  • 7. Retighten the fitting and again draw vacuum three more times. (Repeat steps 5 - 7).

The chlorinator may now be left on the tank, removed from the tank and replaced, or the tank may be capped if it is not to be immediately used.

Troubleshooting Procedures

The SHITAL Enterprisesgas chlorinators, when installed and operated according to instructions, require little service. The following is a concise summary to aid in reliable service when it is required.
Before removing the chlorinator from the chlorine tank, for any reason, the device must be evacuated of residual gas. Please consult with the Shutdown section for further information.

Pressurized Chlorine Leaks

● Leaks external to the chlorinator device can come from two sources: the gas cylinder valve and the lead gasket between the cylinder valve and the chlorinator inlet assembly. If such of an external leak is suspected:

    o Squeeze an ammonia bottle several times around the gas cylinder valve. If a leak is detected there, perhaps you may be able to tighten the valve connection to correct it, but you may need to close the valve, evacuate and remove the chlorinator, remove the cylinder, and contact the chlorine supplier. You may try to remove the cylinder to a safe outside location, but never put it in water!
    o Squeeze an ammonia bottle several times around the chlorinator inlet assembly on the back of the unit. If a leak is found here, the lead gasket between the chlorine cylinder valve and chlorinator inlet assembly can be secured by tightening the screw used to fasten the chlorinator to the valve. It should be apparent if this screw needs tightening, so do not over tighten it. If you feel the lead gasket needs replacing, use only those supplied by Hydro Instruments with the original equipment. If you need more, please contact us.
    REMEMBER: Before removing the chlorinator from the chlorine tank, for any reason, the device must be evacuated. Please consult with the Shutdown section of this document before proceeding.
● Leaks in the actual chlorinator unit, although rare, do occasionally occur. If such a leak is suspected, squeeze the ammonia bottle several times around the unit, especially around the back and the meter parts. If a leak is found, evacuate the unit, close the cylinder valve, remove the unit and return it to Hydro Instruments for repair or replacement. Please accompany the unit with an explanation of the problem and identify where it came from. If a replacement is required immediately, please contact Hydro Instruments.

Internal chlorinator leaks:

● There are two types of internal chlorinator leaks: leaks from the safety inlet shut off valve and leaks from the vent.

    o The purpose of the chlorinator safety inlet shut off valve is to control the flow of gas so that it is allowed only when the system is operating and supplying a vacuum from the ejector to the chlorinator. If the water supply to the ejector is turned off, or if the connecting line is disconnected, the valve is closed and the flow of gas to the system is then shut down. Over a period of time dirt can accumulate on the valve seat and cause it to malfunction and leak gas into the system, even though the system is shut off.

To service the inlet safety valve:

  • 1. Evacuate the system.
  • 2. Turn off the water supply to the ejector.
  • 3. Remove the chlorinator from the gas cylinder.
  • 4. Remove the two screws holding the metal yoke plate to the chlorinator body.
  • 5. Grab the metal yoke and with a slight turning motion pull it out of the chlorinator body.
  • 6. Grasp the plastic O-ring side of the inlet assembly and turn counter-clockwise.
  • 7. Insert a small screwdriver in the valve slot and hold the vent plug (it is shaped like a bullet) and unscrew.
  • 8. Examine the teflon valve seat and valve sealing plug. Use a soft, clean cloth with acetone to clean the valve plug, seat, and bullet. Never use a screwdriver or other sharp object to clean the valve or the seat!
  • 9. Assemble in reverse order. Do not use pliers to hold the bullet. Use your fingers and turn the slotted valve with a correct size screwdriver. Be certain to put the tiny silver washer on the valve plug. Also turn the seal plug back into the inlet adapter hand tight.
  • 10. Replace the filter material.
  • 11. After remounting the chlorinator with a new lead gasket, complete a vacuum test before turning on the cylinder valve. See Start Up of Chlorination for further reference.
● The purpose for the chlorinator vent is to vent any gas that happens to escape from the inside of the chlorinator vacuum chambers. If leaking gas is detected here with the ammonia bottle and the leak persists, contact Hydro Instruments for repair or replacement of the device.

No Chlorine Feed:

First, check to make sure that you are not out of chlorine. When the chlorine supply is depleted the meter ball should be at zero and the RED indicator on the front of the unit should be showing.
Next, check for suction at the end of the tube that connects the ejector to the chlorinator. It is this suction that "pulls" the chlorine from the cylinder and through the unit and mixes it with the water solution flowing through the ejector. The vacuum should be noticeable when feeling for it at the end of the tube. If little or no suction is there:

● Check the nozzle in the ejector to be sure that it allows for a clear and unrestricted flow of water.

  • o First turn off the water supply and remove the nozzle from the ejector.
  • o It may be clogged with a stone or other foreign matter. Run a pipe cleaner through it and flush out with clean water.
  • o There may be a build up of foreign substances such as rust, iron, or manganese. If so, place the nozzle in a mixture of muriatic acid for five minutes and rinse with clean water. If you see a black syrup substance you may find it necessary to clean nozzle on a preventive maintenance schedule.
  • o If the nozzle appears to be damaged, contact SHITAL ENTERPRISES for assistance.
● Check the inlet water supply for:
  • o Reduced water pressure.
  • o Y-strainer needs to be cleaned out.
  • o Booster pump is cavitating (lost its' prime).
  • o Booster pump is providing insufficient boost due to wear or single phasing due to loss of one leg of power.
  • o Booster pump has flooded suction.
  • o Take corrective action with any of the above deficiencies. If, necessary,contact SHITAL ENTERPRISES for assistance.
● Inlet filter material could be dirty and would need to be replaced. NOTE: first you must close the chlorine cylinder valve and evacuate the chlorinator before removing it from the cylinder.

Rate Valve O-ring Seal Replacement:

  • 1. First, turn off the gas cylinder valve and evacuate the chlorinator.
  • 2. Turn off the water supply to ejector.
  • 3. Unscrew the rate valve from the top of the meter and remove it.
  • 4. Place a piece of tape or cloth around the monel bonnet, grip firmly with pliers and turn counterclockwise.
  • 5. Under the bonnet you just removed, is an O-ring. Remove and replace it with a new O-ring, seating it with the eraser end of a pencil.
  • 6. Replace the monel bonnet, hand tighten it, and replace the rate valve HINT: Now would be a good time to clean the rate valve by sliding a piece of paper or business card through the groove in the bottom of the valve.
  • 7. Turn on the water supply to the ejector, and then turn on the gas cylinder valve.

Setup and Precautions

Setup

The most basic SHITAL Enterprises single point application chlorination or sulfonation system includes:

  • 1. The appropriately sized chlorinator which mounts on the chlorine cylinder.
  • 2. The ejector (with appropriate nozzle and diffuser) which is installed directly to the pipe line, storage tank, or wet well.
  • 3. The following installation accessories:
    • o Appropriate sizes and lengths of polyethylene tubing and CPVC Pipe.
    • o Hose and tubing adapters and clamps.
    • o Ammonia bottle.
    • o Required spare lead gaskets and other gaskets and fittings.
    • o Filter material and/or insect screens.
    • o Cylinder wrench.
    • o Literature including standard product, start-up, and changing chlorine cylinders bulletins as well as chlorinator and ejector parts drawings.
    • o Other parts or accessories as may be required.

The configurations possible for SHITAL Enterprises' chlorinator or sulfonator systems could be more complex than the single point application system described above. Examples would be remote metered, automatic standby, or multi point application systems. Please consult with SHITAL Enterprises at the time of the order for an exact listing of included parts and accessories.

Additional parts which may be required and are available from any plumbing supply store
(or which can be ordered through SHITAL Enterprises):

  • ● Pressure gauge
  • ● Water shut off valves
  • ● Y-type strainer

Precautions:

  • 1. Ammonia gas should never be stored or fed in the same room with chlorine. Contact of the gases may result in an explosive mixture.
  • 2. Always keep the chlorine cylinder in an upright position with the valve cap screwed on tight before moving full or empty cylinders. Cylinders should be moved with care.
  • 3. A safety chain must be placed around the cylinder and secured to a wall. Spare full cylinders should also be secured.
  • 4. For best operation and safety, the chlorinator and cylinders should be protected from the elements and from direct sunlight.
  • 5. Never apply heaters or heat lamps directly on a cylinder.

Leak Absorption System

The system consists of Hoods for covering the chlorine tonner / cylinder where chlorine gas outlet valves are fitted. The storage tank are fabricated as one piece. Highly efficient centrifugal blowers of suitable size, necessary Hoods and Ductings are provided as per the number of tonner / cylinder accounted for service. Centrifugal pumps for caustic solution re- circulation is also a part of the tonner based system.

1. FRP HOOD FOR CHLORINE TONNER / CYLINDER – FULL HOOD :

The system consists of a hood covering the complete chlorine tonner / cylinder where liquid / gas chlorine outlet valves are fitted. Hoodas are provided with 20 mm peripheral air gap for entry of fresh air during working of system.

2. FRP DUCTING :

Required quantity of FRP Ducting of size 150 MM ID is provided for leaked chlorine gas from Hoods to Centrifugal Blowers and From Blowers to absorption tank.

3. BLOWER WITH ELECTRIC MOTOR (FOR Cylinder) :

The system consists of 1 No. of highly efficient centrifugal blower of 500 M3/Hr at 800 mm WG capacity for suction of leaked chlorine from Hoods to the Absorption Tank.

4. BLOWER WITH ELECTRIC MOTOR (FOR Toner) :

The system consists of 2 Nos. of highly efficient centrifugal blower for suction of leaked chlorine from Hoods to the Absorption Tank.

5. DAMPER FOR FRP DUCTING :

01 No. FRP Dampers of size 150 mm ID is provided at discharge line of Blower and per Hoods 01 No. FRP Dampers of size 150 mm ID is provided at suction line of Blower to control the flow of Chlo – Air mixture through FRP ducting.

6. PRESSURE INDICATOR ON CAUSTIC PUMP DISCHARGE (FOR Toner) :

01 No. Pressure Indicator is provided on discharge line of Caustic Pump for indication of caustic line pressure.

7. PRESSURE INDICATOR ON BLOWER DISCHARGE :

01 No. Pressure Indicator is provided on discharge line of Blower for indication of pressure of Blower Discharge Line.

8. CAUSTIC SOLUTION TANK (For Toner) :

01 No. Caustic Tank of Capacity 8 M3 made of PP + FRP is provided for storage of 20 % conc. Caustic Solution.
The Caustic Tank consists of :
01 No. – Level Indicator of Glass Tube type for indication of level of caustic solution in the tank. Various Nozzles for inlet and outlet of caustic solution, Drain Valve with Drain Line, Overflow Line, Water Supply Inlet Line, Manhole, Vent, Diffuser etc.

9. CAUSTIC SOLUTION TANK (For Cylinder) :

01 No. Caustic Tank of Capacity 3 M3 made of PP + FRP is provided for storage of 20 % conc. Caustic Solution.
The Caustic Tank consists of :
01 No. – Level Indicator of Glass Tube type for indication of level of caustic solution in the tank. Various Nozzles for inlet and outlet of caustic solution, Drain Valve with Drain Line, Overflow Line, Water Supply Inlet Line, Manhole, Vent, Diffuser etc.

10. CAUSTIC SERVICE PIPING :

Required quantity of PP Caustic Service Piping of size 63 mm OD, 50 mm OD and 90 mm OD as per standard DIN : 8077 / 8078 is provided for re-circulation of caustic solution.

11. ‘Y’ TYPE STRAINER FOR CAUSTIC SERVICE (For Toner) :

01 No. Polypropylene ‘Y’ Type Strainer of size 2 “ is provided on Caustic Service line at suction line of Caustic Pump to avoid passage of small particles.

12. NON RETURN VALVE FOR CAUSTIC SERVICE (For Toner):

01 No. Polypropylene Non Return Valve of size 2 “ is provided on caustic service line at discharge of Caustic Pump.

12. NON RETURN VALVE FOR CAUSTIC SERVICE (For Toner):

01 No. Polypropylene Non Return Valve of size 2 “ is provided on caustic service line at discharge of Caustic Pump.

13. CAUSTIC RE – CIRCULATING PUMP WITH ELECTRIC MOTOR (For Toner) :

01 No. Caustic Re-Circulating Pump of capacity 10 M3/Hr at 10 Mtr head along with suitable motor is provided on caustic solution line to re – circulate the caustic solution in to the absorption tank.

14. WATER SUPPLY PIPING FOR CAUSTIC TANK :

Required quantity of GI water supply pipe of size 1 “ to deliver water into the Caustic Tank for dilution of Conc. Caustic Solution.

LUBRICATION SCHEDULE

The lubrication schedule is mainly required for the rotating parts of the Caustic Pumps and Blowers. The Caustic Pumps and Blowers are required to be lubricated once in three months time. Caustic Pumps shall be replenished with oil as per SAE – 30 or equivalent.

  • Meggar test the motor and check for direction of rotation.
  • Check for foreign material inside the Blower.
  • Check the Impeller and remove any material formed on the blades.
  • Rotate the Impeller by hand and see whether it is rotating freely without any friction of the sides.
  • When the direction etc. are checked, start the Blower.

GENERAL WRITE- UP OF CHLORINE GAS ABSORPTION SYSTEM FOR TONNERS / CYLINDERS IN THE CHLORINATION ROOM

CHLORINE GAS ABSORPTION CAPACITY = 1000 KG/HR (For Tonner)

CHLORINE GAS ABSORPTION CAPACITY = 100 KG/HR (For Cylinder)

LEAKED CHLORINE ABSORPTION SYSTEM

The system is designed to absorb leakage of chlorine leaking from one filled Toner / Cylinder in one hour time. The system is designed to absorb the chlorine gas and not liquid chlorine leaked from the Toner / Cylinder. To stop the leakage of liquid chlorine from toner is the difficult task as the liquid chlorine expands as soon as it enters into the atmosphere. Normally as soon as you find the liquid chlorine is leaking from the valve or body of the toner, you must rotate the toner in 180 degree to convert the liquid chlorine leakage into gas chlorine leakage. The chances is very less for leakage of liquid chlorine from cylinders because it is always used in vertical position.

PROCESS DESCRIPTION OF ABSORPTION SYSTEM :

The system is designed to absorb leakage of chlorine leaking from one filled Toner / Cylinder in one hour time. The system is designed to absorb the chlorine gas and not liquid chlorine leaked from the Toner / Cylinder. To stop the leakage of liquid chlorine from toner is the difficult task as the liquid chlorine expands as soon as it enters into the atmosphere. Normally as soon as you find the liquid chlorine is leaking from the valve or body of the toner, you must rotate the toner in 180 degree to convert the liquid chlorine leakage into gas chlorine leakage. The chances is very less for leakage of liquid chlorine from cylinders because it is always used in vertical position.

Preventative Maintenance

To ensure the longevity of your SHITAL ENTERPRISESs product(s) we recommend that they be routinely checked for cleaning and replacement of worn or damaged parts.

Recommended Guidelines for Preventative Maintenance:
  • 1. Service vacuum regulator(s) every 12 months.
  • 2. Service the switchover module every 12 months.
  • 3. Service rate valve assemblies every 4-12 months.
  • 4. Service flow meter(s) (vacuum regulator & remote meter) every 12 months.
  • 5. Service ejector(s) every 12 months.
  • 6. Replace vacuum tubing every 12-18 months.
  • 7. Replace vacuum tubing fittings every 18-24 months.

For detailed instructions on servicing your SHITAL ENTERPRISES product(s) please refer to the appropriate Operation & Maintenance manual. This manual was provided with your SHITAL ENTERPRISESs gas chlorination system.

Proper Cleaning of Gas Chlorination Components:

When servicing your SHITAL ENTERPRISES gas chlorination equipment you may find it necessary to clean parts due to chemical precipitants or accumulation of some other foreign matter. When this circumstance presents itself please follow these guidelines to make sure those parts do not become damaged or disfigured:

  • 1. Only use mild solvents such as: Soap & Water, Aqueous acid or Isopropyl alcohol.
    NOTE: NEVER USE HARSH CHEMICALS THAT CAN ATTACK THE MATERIAL IT’S BEING USED ON. FOR EXAMPLE: DO NOT USE ACETONE OR CLEANING AGENTS CONTAINING ACETONE ON PLASTIC OR RUBBER.
  • 2. Use a soft, nonabrasive cloth to wipe away the accumulation of debris or chemical build up. This is especially true for parts that require a smooth surface to seal properly (i.e. the inlet valve stem or rate adjustment valve).
  • 3. Make sure to only use new O-rings and gaskets of the appropriate material when putting the product back together. Worn or compromised seals can be a hazard.

Change In Cylinder Safely

  • 1. Turn chlorine cylinder valve closed (clockwise). Be sure chlorine cylinder valve is closed and not stuck in an open position.
  • 2. The chlorine feed rate valve should be fully open (about 3 turns).
  • 3. Turn on ejector water to produce vacuum. Ball in meter tube should drop to bottom and vacuum Regulator button should be go inside means no chlorine inside now.
  • 4. Turn off ejector water supply and wait 5 minutes. The Button must be see continuously inside.
  • 5. Be positive the chlorine cylinder valve is closed before you remove the vacuum regulator. Slowly turn the yoke screw loose to carefully remove the vacuum regulator from the cylinder valve. Place valve cap and hood on empty cylinder.
  • 6. Secure new full cylinder with chain. Remove hood and slowly remove valve cap to be sure new cylinderwas closed properly.
  • 7. Remove packing materials from vacuum regulator inlet (new unit only). Be careful not to let filter material drop out of inlet assembly. Change the filter material if it looks dirty.
  • 8. Remove old lead gasket and install new lead gasket on vacuum regulator inlet. NOTE: Reusing lead gaskets will cause leaks and never use more than one lead gasket.
  • 9. With new lead gasket in place, put vacuum regulator on cylinder and tighten yoke screw with appropriate twisted cylinder wrench. (Do not use excessive force.)
  • 10. Open chlorine cylinder valve 1⁄4 turn and close immediately. Check for leaks with ammonia using plastic squeeze bottle to direct ammonia fumes around lead gasket, cylinder valve andtwo fittings on vacuum regulator. The ammonia will appear as a white smoke if you have a chlorine leak.
    If you have a leak, connect tubing from ejector to the vacuum regulator vacuum fitting and turn on ejector so chlorine can be pulled through ejector to process water.

  • Correct leaks before proceeding
  • Hook up vacuum tubing from ejector to the vacuum regulator vacuum fitting.
  • Hook up vacuum tubing from the vacuum regulator vent fitting to vent to safe outside location. (Notnear walkways or ventilation intakes.)

  • 11. If no leaks were detected, turn on chlorine cylinder valve 1⁄4 turn and recheck for leaks. (Keep the wrench on the cylinder valve.)
  • 13. Adjust feed rate with rate valve and test for chlorine residual.
  • 14. Be sure you understand this information before you begin. Before you ever turn on a chlorine cylinder valve, be sure your ejector has vacuum or suction so you can feed chlorine to process water.